 Inky's Hexen II Mapping Corner...
An Excursion to Carcosa Quake mod - Author's Insights
How I designed my one-of-a-kind Quake mod...

Download the masterpiece now!
(Final version: 1.1, in the Re:Mobilize mod)
Introduction - How I started this project
My very unique Church of the Unholy map did not meet the success I had hoped for. Despite all the love I had infused into it, I came to the conclusion that it would possibly be my first but also last attempt in the Quake mapping world.By chance, even if they're not many, some people truly loved my vision and personal touch. One of them, called EmeraldTiger, got in touch to tell me how much he had appreciated it, and offered to take part to the new project he was starting: a brand new Quake mod called Re:Mobilize, introducing no less than three new movement-based mechanics. He was looking for people to make maps in order to showcase his mod and he thought my creativity could help.
Poor him, he didn't know at the time he was opening the Pandora box!
Not only I felt honored and gladly accepted, but I soon decided that his initial ideas envisioned only a small amount of all the crazy potential his mechanics had. That's how I started a one-year long commitment of not only making this map, but also adding a tremendous amount of code and customization options on top of the already brilliant progs_dump 3.0 code base.
This page mainly focuses on the map itself, mostly focusing on the artistic perspective, intentions and inspirations...
A literary inspiration
-
The King in Yellow by Robert W. Chambers, a collection of short stories written in the late XIXth century having developed its own pre-Lovecraftian cosmic horror.
I also took Chambers' own sources of inspiration: An Inhabitant of Carcosa and Haita the Shepherd by Ambrose Bierce. - The Haunter of the Dark by Howard Phillips Lovecraft, my favorite short story of the author.
- Providence, the mind-blonwing comic series by Alan Moore and Jacen Burrows revisiting the whole Lovecraftian mythos... and Chamber's one as well!

For the general mood, tho, the main source is Cassilda's Song. This poem serves as the opening of The King in Yellow, prior to the stories themselves. So, it sets the atmosphere for the stories collection and for the Quake map as well:
❝ Along the shore the cloud waves break,
The twin suns sink behind the lake,
The shadows lengthen
In Carcosa.
Strange is the night where black stars rise,
And strange moons circle through the skies
But stranger still is
Lost Carcosa.
Songs that the Hyades shall sing,
Where flap the tatters of the King,
Must die unheard in
Dim Carcosa.
Song of my soul, my voice is dead;
Die thou, unsung, as tears unshed
Shall dry and die in
Lost Carcosa. ❞
- Cloud waves not being literally possible in the Quake engine, I chose to evoke them by the presence of the fog bathing the map. Since the shadows lengthen, it is supposed that things take place at dusk, hence the orange color of the fog, symbolic of how the light turns to orange at sunset. The ambiguity in associating cloud waves and a lake doesn't orient things in the direction of a literal water lake. That's why the map has endless pits to an aerial "lake" embodied by a skybox.
- The twin suns can somehow be witnessed in Ironwail thanks to wind settings kindly set up for me by Heresy. If you have the patience to stay long enough staring at the skybox, you'll see the big star/moon/sun in the sky slowly split into two overlapping instances, like on the edge of 2 dimensions. That's visually crazy.
- The black stars being one of the most striking elements of the poem, they are of course prominently showcased in the skybox (actually the negative version of a Makkon skybox, inverted by Heresy). The big star/moon/sun/whatever can also play the role of the strange moons.
- The Hyades is a cluster of stars in the head of the Taurus constellation. The skybox might arguably feature that star cluster. The library's back room also references it more precisely. More generally, Taurus is noded to with many occurences of bull switches coming from the Hexen game ("Taurus" means "Bull" in Latin).
-
The flapping tatters of the King can be found in various places throughout the map in the form of damaged yellow banners hanging in the graveyard or from the lower city tower, and also as the yellow sail of the boat. Only the tatters can be seen, not the king itself as, just like in Chambers' work, the king is an ominious presence or idea whose exact nature and look is unclear... Is it even a character, to start with? Or a god? A concept? Something else...?
The map deals with this ambiguity by featuring unsettling yellow murals open to interpretation. Most were AI-generated in Craiyon, so that the "uncanny valley" phenomenon which is so typical of AI-generated pictures aptly serves the story(un)telling. In order not to put all the eggs in the same basket, there's also a real (human-made) painting in the forge. So, things keep undecided between literal/abstract interpretations, real-world/otherworld king... This echoes the The Demoiselle d'Ys story taking place in Middle Ages, in which the King in Yellow universe seems to be more down-to-earth than in the previous stories, while still very oniric.
- The need to prominently showcase the new movement-based mechanics introduced by Re:Mobilize (that's why I was recruited on the project, to start with).
- My own desire to exploit the fantastic scripting possibilities offered by progs_dump 3.0 (that I ended up expanding even more), being all at the same time a tribute to that mod on which Re:Mobilize is based, a friendly homage to dumptruck_ds and his efforts to promote that kind of mapping, and a good way to offer a Hexen-II-ish adventure full of mechanisms, advanced scripting sequences, references and storytelling... which all form my personal touch.
Detailed tour
The map forms what could arguably be described (were it Hexen II) as a small hub. It is very prominently divided in distinct connected areas, each with their own mood. Let's see them in detail and start our excursion to Carcosa...| Swamp |
- Introducing the player with Re:Mobilize mechanics featured in unusual ways, instructing them that the mechanics will be present, but not necessarily in the same form as in the other maps of the map set.
- Making it clear right away that the map won't be a flowing one but a puzzley one instead, requiring a careful exploration and out-of-the-box thinking.
- Featuring custom keys early, so that they become a natural and expected part of the gameplay, and the custom keys HUD too, as it may serve as a help for players to remember what items they have in their inventory and lead them to think about how they could use them.
- Throwing in the first bits of King in Yellow-ish imagery to settle the specific theme and mood of the map.
The place also features the same kind of "signature panel" already present in Unholy, which was easy to miss in the previous map, and is made slightly more prominent here... and in Carcosa's companion secret map as well.
Another secret is about the ring which is admittedly not very useful at this stage of the adventure, but it was fun to hide something in plain sight and feature a well-know asset in such an unusual way. Couldn't miss the opportunity.
Using a brand new approach to classic elements of the game or remixing them in creative ways is definitely one of my pleasures and, even more than the ring, the best example of this design principle in the starting place is of course the starting weapon. For once, it must not be simply considered as "the melee weapon of the FPS game" but really as what it is: an axe. And what are axes for? Cutting wood!
So I'm funnily enough forcing the player to think out of the box by... precisely forcing them to think inside the box, in-lore, and to forget their gamer's usual conventions.
I guess some will never figure out and rage noclip through the door but hopefully those finding the trick will appreciate the puzzle and be more ready to adopt a different state of mind for the rest of the map.
|
Hali's lake, death and kiosks |
This place prominently features Carcosa's most distinctive theme: a reminiscence of classical sophisticated limestone buildings with round shapes, moldings, columns, contrasting blueish cupolas, topiaries, fountains and statues. While not being used everywhere in the map, far from it, this style stands out even more in the few keys places where it's used:
- Carcosa's entry pod in the Re:Mobilize start map, which clearly establishes this theme as Carcosa's signature theme.
- The upper city plaza's perspective, with the topiaries and colonnades leading to the kiosk, the fountain and the chasm (which is another way to get to Hali's Lake).
- Hali's Lake itself.
❝ They all float down here. ❞

Hali's Lake

Isle of the Dead (third version, 1883)
(Click on the picture to enlarge)
Taking the boat is one of the two alternative endings to An Excursion to Carcosa. Symbolically it's a very final ending indeed, since the player is nothing less than gently invited to peacefully die (a nod to Doom's E1M8: Phobos Anomaly, but in a kinder way). I like the symbolism of the departing cutscene which adds visual interest to the intermission: the game itself is over, but things go on happening on screen (the boat leaves, the footbridge retracts).
About Arnold Böcklin's painting, a common interpretation is that the oarsman represents the boatman Charon, who ferried souls to the underworld in Greek mythology. The water would then be either the River Styx or the River Acheron, and his white-clad passenger a recently deceased soul transiting to the afterlife.
Things are reversed in the map for the sake of clarity: the eerie character in robes is dressed in black and will more spontaneously evoke the death (and possibly be associated to the idea of the King in Yellow himself, or one of his avatars). And the one at the rear of the departing boat in the ending cutscene is not the ferryman anymore but the player. Another noticeable variation from the painting is that the boat has a tattered yellow sail. Of course a reminiscence of the flapping tatters of the King in Yellow associated with death in that excerpt of Cassilda's song:
❝ Where flap the tatters of the King,
Must die unheard in
Dim Carcosa. ❞
The reason why both kiosks are associated with death is that they are how I chose to represent the lethal chambers evoked in The Repairer of Reputations (one of the short novels in The King in Yellow by Robert W. Chambers):
❝ It was, I remember, the 13th day of April, 1920, that the first Government Lethal Chamber was established on the south side of Washington Square [...] the whole block was enclosed by a gilded iron railing, and converted into a lovely garden with lawns, flowers and fountains. In the centre of the garden stood a small, white building, severely classical in architecture, and surrounded by thickets of flowers. Six Ionic columns supported the roof, and the single door was of bronze. A splendid marble group of the "Fates" stood before the door, the work of a young American sculptor, Boris Yvain, who had died in Paris when only twenty-three years old. ❞

Exit garden in Providence (Alan Moore & Jacen Burrows)
(Click on the picture to enlarge)
| Graveyard and pass |
Gameplaywise, there's a nice variation around switchable lightpanels. Since this map is rather "medieval", unlike the electric lightpanels switched on in tech maps, here they are activated by being unveiled. Initially they are hidden behind worn out banners intended to remind the "flapping tatters of the King", a nod to Cassilda's song once again (the banners are also a showcase of the progs_dump misc_modeltrain entity).
The banners slide sideways thanks to poles with arrows (yellow, of course) which were an occasion for a pun ("whack-a-pole" vs "whack-a-mole"). I enjoy puns at most and try to insert some whenever I can, which is a challenge considering English is not my mother tongue. I hope this one works well enough.
Other audacious attempt in the graveyard: a shambler not simply teleporting in but emerging out of a raising ground. This boss fight happens really early when the player is still equipped with their shotgun only, and the lightpanels are supposed to allow a fast-paced bouncing spiderman-like fight. Upon death, the shambler releases a key which turned out to be hard to spot, depending on where the monster had fallen dead (the screen tinting of the quad damage not helping). That's why I used the progs_dump particle effect to draw the player's attention and centerprinted a message. Although I was initially not so much hyped by the look of the particles, they turn out to do their job well enough and are aptly yellow, so...

New gameplay addition: the puzzle items HUD
Last but not least, the graveyard introduces a monster dropping a custom key when dead (an improvement of Re:Mobilize over progs_dump) and instructs the player about the custom keys inventory and how to use it. This could have been done as soon as grabbing the swamp key in the starting area, but that area was already heavily loaded with lots of things to focus on for the player (the axe puzzle, the unusual trampoline and wiremeshes...) and the big tree would likely have been in the way, partially hiding the HUD. So it felt more relevant to postpone the introduction of the HUD in the wide open area of the graveyard, once the shambler had been killed and the place was resting in peace again. Opening the graveyard gate can therefore be considered as quitting the training area and entering the adventure for real. An new weapon and a brand new kind of monster await just past the gate, which reinforce that idea.
The bouncing cockroach (as someone called it) is a Heretic II G'Krokon. I reused the assets (model & sounds) but the monster code is the one of monster_demon, so it's not really a new monster but a showcase of progs_dump monster customization options. The only improvement brought by Re:Mobilize regarding monster customization is the possibility of changing the bounding box size to fit the replacement model size. I'm really happy with how well this monster works in packs. It offers a sensibly different experience compared the demon (despite they share the exact same code) and feels like it's really a new monster and not just a demon in costume.

Fiend in disguise
There is a double puzzle to solve to eventually enter Carcosa:
- Reach the switch commanding the drawbridge by climbing the tree to bounce on the sponge pad (the starting area is supposed to have teached how to use the two of them, so now figuring out the combo should not be such a problem).
-
Reach the buttons commanding the opening by climbing the portcullis which is a disguised wiremesh. I'm really breaking the usual conventions here since the wiremesh is not embodied by a special texture but by 3D brushwork, so it might take a bit time for the player to figure out. To help this somewhat counter-intuitive puzzle:
- The player has hopefully spotted the buttons on the ogre ledges, whose openings are obviously too high. That may suggest the idea of climbing.
- The portcullis makes it hard seeing the courtyard behind clearly, so the player may be prone to hug the grate and jump to see better... and then realize they're on a wiremesh.
- I had already put wiremeshes using 3D brushwork in the starting area (collapsed bridge) so it may not feel so counter-intuitive, after all. And indeed, I got feedback from a playtester that the 3D bridge felt a more intuitive wiremesh than the big tree foliage close by!

Original design: E2M5: The Wizard's Manse

Carcosa remix

A distant echo in Carcosa's entry pod
| Court of the Dragon |
My idea was to redo something along the lines of Sandy Petersen's E4M5: Hell's Atrium. The exit gate is seen right away, taunting the player, yet it's not necessarily the only way to exit the map. At some point, the player will have to choose between using their gold to either open this gate or pay the passage to the Isle of the Dead to the Grim Reaper. Just as in Sandy Petersen's map, that is not a real choice since the player is not clearly explained that two options exist; it is something which emerges when replaying the map another way. Both options offer a nice ending: either a cool gold melting sequence + bonus secret map, or a nice cutscene. The secret exit turned out to become the one used by most players as the gate keeps constantly visible and better matches what Quake exits usually look like, compared to the boat located in a easily forgettable (and maybe not even visited) place. The regular exit leading back to the start map eventually became the "secret" exit.
The courtyard makes the connection between the upper and lower cities. Splitting Carcosa in two cities serves several purposes:
- In-lore, the King in Yellow play features two sisters named Cassilda and Camilla, and the city of Carcosa is supposed to feature towers. Building a complete city with dozens of towers would have been beyond me, but the exact count of towers is unknown, by chance. So only two towers could match the description after all: one tower for each sister, and that's it.
- Re:Mobilize mechanics are meant with a new approach of verticality in mind, so going from the lower city to the upper one was a good occasion to showcase the mechanics (trampoline + wiremesh in the lower city courtyard, climbing vines in the pasture).
| Pasture |
The wrath of Hastur, the storm and destruction are represented with the offering trick and the thunderbolt granted by the god.
Funnily enough, when players hear about making an offering to Hastur, their first idea consists in slaughtering the innocent boy and his sheep. Ah, those Quake players... !
| Plaza |
❝ It was, I remember, the 13th day of April, 1920, that the first Government Lethal Chamber was established on the south side of Washington Square [...] the whole block was enclosed by a gilded iron railing, and converted into a lovely garden with lawns, flowers and fountains. In the centre of the garden stood a small, white building, severely classical in architecture, and surrounded by thickets of flowers. Six Ionic columns supported the roof, and the single door was of bronze. A splendid marble group of the "Fates" stood before the door, the work of a young American sculptor, Boris Yvain, who had died in Paris when only twenty-three years old. ❞
The player being rushed at by zillions of bugs is a scary vision coming straight from Paul Verhoeven's Starship Troopers movie. This works especially well, and I'm pretty proud of the progress I made since Church of the Unholy concerning encounters.

Bugs attack the space marines!
 The Cupid statue is an asset brilliantly crafted by docjr5 especially for this map. As a flagship element of the bathing-room decoration in the The Mask short novel, it was an indispensable prop for the map. Its making having taken time, during weeks a Neptune statue was used as a placeholder instead. And when the Cupid was ready eventually, it turned out not to fit so well in the place he was meant for. I kept the Neptune there (it is relevant for a bathing-room, given the god Neptune's association with water) and the magnificent Cupid became the highlight of the small fountain garden behind the kiosk. It was also prominently featured in Carcosa's entry pod to spotlight it more, and became Carcosa's mascot of sorts, in all gratitude to docjr5.
| Bathing-room |
❝ I stopped in the bathing-room. Boris, all over clay, stood there washing his hands.
The room was built of rose-coloured marble excepting the floor, which was tessellated in rose and grey. In the centre was a square pool sunken below the surface of the floor; steps led down into it, sculptured pillars supported a frescoed ceiling. A delicious marble Cupid appeared to have just alighted on his pedestal at the upper end of the room. ❞
Here comes one of the coolest and most unexpected tricks featured in the map: monsters being petrified when seeing the player once they wear the mask. I'm especially proud of this trick since it doesn't involve any unfair super power I might have arrogated as Re:Mobilize's co-author. I didn't abused my contributor privileges to code anything specifically for my map. Instead I used an existing loophole in the progs_dump 3.0 implementation, and any mapper could have done the same.
Here is the key function:
void() monster_teleport_go =
{
self.solid = self.tele_solid;
self.movetype = self.tele_movetype;
setmodel(self, self.tele_model);
setsize (self, self.tele_mins, self.tele_maxs);

self.delay = 0; //fix for cumulative delays for counters etc. -- dumptruck_ds

self.think1();
//override the random delay some go functions apply
self.nextthink = time + 0.1;
	{
		if !(self.spawnflags & SPAWN_SILENTLY)
		{
			if (self.wait == 0)  //dumptruck_ds: if wait value is > 0 spawn silently or use a spawnflag
			spawn_tfog (self.origin);
			spawn_tdeath(self.origin, self);
		}
	}

}
No matter what it's primarily intended for, the most interesting features of this function are:
- It sets the model of the "self" entity to whatever is in the entity's tele_model property
- It calls the entity's think1 function.
For the trick to work, all the monsters in the room are knights. Yes, even the shamblers (they are knights in disguise thanks to progs_dump's monster customization facilities). The thing is: they are melee monsters. As such they have no ranged attack, which means than, code-wise, they have no th_missile function set by default. As modders know, when something is not automatically set by the game code, it's then free to override. The knights' th_missile function was set to monster_teleport_go. Thus, each time they see the player in distance, the AI triggers the th_missile function to perform the associated ranged attack. Instead of doing nothing as usual because there is no such function set, this time a "range attack" occurs, which consists in calling monster_teleport_go and changing the monster's model to a stone version of it, then calling think1 (it is set to knight_die so that the monster gives up the fight and instantly dies), and eventually a nice teleport effect occurs.
Note that, because of this th_missile-based hack, if the player is too close to a knight, the AI won't try to call the ranged attack and the monster will start engaging a melee fight. The player must then retreat for the petrification to occur. Trying to beat the monsters the usual way can't happen: I made sure of it by giving them a very high HP count, because the monsters couldn't support both classic death and petrification for technical reasons. Also for that reason, the monsters show up only if the player has grabbed the mask, as they're set up for petrification, not for classic fight. All the other monsters in the map aren't set up that way, which is why "The mask won't teleport with you", so that all the combats outside this very room behave as usual.
One of the main characters in The Mask is the young sculptor Boris Yvain (the one having made the marble group of the "Fates" at the "exit garden" depicted in The Repairer of Reputations). That is why the bathing-room is accessed by going through Yvain's workshop. That's a nice small room with an accent on decorative assets (coming from Hexen II, just like the statues outside). The reason for this room to be is the literary reference, but it is also home of a cool small uncredited secret. Had you noticed it?
| Cassilda's tower |
The textures used in the basement come from Simon O'Callahan's One Thousand Cuts map. I love the texture set and used it in a few other occasions in Carcosa (library ground floor and back room, treasure room).
Being pulled upwards felt the right way to resume the exploration, and I wanted the player to enter the next room in a delicate situation, hanging from the light hook and under enemy fire at the same time. Yet I couldn't avoid the annoyance of the player being susceptible to release the hook and fall down back in the basement. Putting the lightpanel not straight up could have helped, but at the same time it didn't feel right. We'll have to cope with that non ideal setup.
At least the lightpanel is granted a double-use thanks to the "slingshot effect", once the hatch blocking it is destroyed from above. That is a rare use of such a trick (Re:Mobilize's start map also uses it with the big translucent orange lightpanels), and the only occurrence in Carcosa. Hence the players generally having a hard time at figuring out. That's life! The trick is interesting enough to deserve being showcased anyway, even if gameplay-wise it could probably have been introduced in a far better way.

The burning eyes are my personal take on an iconic artwork from the KDM texture set by Kell
The antigravity well back to the previous room showcases a volumetric wiremesh. Technically speaking, it's a normal wiremesh. What makes it special is that it's shaped as a 3D volume instead of a 2D surface hugging a wall or ceiling. It also uses custom sounds and its speed is reduced to 100 (one third of the usual speed). The outcome is pretty good and offers a new way to navigate up/down; a fourth Re:Mobilize mechanics of sorts.
| Recreational area |
Every single bit of this area is a scripting achievement:
- The conversation with the ogre
- The changing portraits
- The "only one door open at a time" system (surprisingly tricky to set up)
- The shooting galery (and its saloon doors with a hanging shotgun)
- The slot machine
- The grenade billiard with bounces counter
The changing portraits in the basement are a reminiscence of a road trip I made in 2016 on the Route 66. The Big Texan steak house in Amarillo (Texas) is a famous roadside attraction along the Route and features a corridor full of such funny macabre portraits (leading to the lavatories!). I didn't imagine I would pay tribute to this anecdote one day in a Quake map!

Definitely a gloomy Quake atmosphere!
Not so much to tell about the three mini-games themselves, apart from the fact they were scripting nightmares and might not be totally bug free, given their complexity. Although trigger_random is a main addition I made to the mod codebase, it's not used at all for the slot machine: there's nothing random in the slots moves, just a matter of different rotating speeds. For that reason, my buddy docjr5 told me that there was a way to beat the machine if you pay close attention to the timing. Despite his explanations, I never figured out how. Tell me if you find the trick!
| Library |
Being rough and grid-aligned even helped the place since I quickly realized it looked very much like a Doom maze. That's how I got the idea of the small referential secret.
Libraries are supposed to be silent and quiet places, and this is true of this one (except for a sneaky fiend standing out all the more, directly inspired by those in Sandy Petersen's E4M4: The Palace of Hate). Well, at least it's silent and quiet the first time you visit the place. This won't last forever...
The big mural is an impressive painting of the King in Yellow, interestingly evocative of how he/it is represented in the True Detective TV show.

The mural in the library (a picture I found on the internet, author unknown)

The macabre grubby jumble made an idol in the TV show

|
The silver key is a courtesy of Mathuz for the model and docjr5 for the ID-inspired texture. It is the 3D version of the Elder Sign imagined by H.P. Lovecraft himself. I've never seen it used as an asset in any Quake map until Carcosa, much to my surprise I must say (but it's true my Quake culture is deplorable). Anyway, fixed! |

Does it make sense?
| Chthon |
Offering a remake of the well-known Episode 1 boss fight was of course an ideal occasion for involving the Re:Mobilize mechanics, and I must say I'm happy with the arena. It definitely works. Simple and efficient like the original fight, faithful and similar yet interesting and fresh at the same time.
As a side note, the place features the only switchable lightpanel of the whole map (if we accept to forget the ones initially hidden behind banners in the graveyard). It activates only when the player is in front of it on the ledge, to keep them from using it from anywhere (things would then be too easy).
| Lower city |
When I think of it retrospectively, I think that the emergency made me take the right decision. A Nameless City recreation would have been like a submap in the map, with a really different and more classic mood (focused on encounters and mechanics). Not that I'm again the principle of submaps in the map (I do that all the time: think of the Chamber of Torments in Unholy or the Recreational Area in Carcosa), but in this case it would have been counterproductive. The main quest involving puzzles and puzzle items is complex enough, so it's better to keep it confined in a manageable low amount of places instead of driving the player crazy with too many corridors and rooms to explore helplessly.
The staircase is spiced up by a turret ogre. It is not any kind of new monster: at the time of this writing, Re:Mobilize doesn't involve any monster other than the vanilla ones, although possibly customized thanks to progs_dump (like the jumping bugs which are demons in disguise). The turret ogre is a complex mix of various entities, including a sitting ogre model which is a modified version of Madfox's well-known fisherman ogre. It constantly follows you thanks to the face_always feature I added to Re:Mobilize to make any model always face the player.

Original iconic fisherman model by Madfox

The same one, his fishing rod gone,
now shooting at rangers instead
There is an interesting use of the Re:Mobilize mechanics with the drawbridge. Initially the bridge lies against the tower wall, letting see through an unreachable shoot button and climb into the tower. Once it was deployed, the button has become shootable but climbing up is not possible anymore so the player has to find another way, which is either
- jump onto the bridge thanks to the big courtyard trampoline
- grasp the hanging banners and climb through the windows
Initially the Re:Mobilize mechanics were meant as static layout elements, so such transformations are unusual enough to deserve being mentioned. The portcullis at the Carcosa gate was another example of a wiremesh being initially there, then gone. Places reconfigured or expanded during the game to reveal unexpected depths are definitely one of my signatures as a mapper (see that up to eleven in Church of the Unholy).
| Hawberk's forge |
Gameplay-wise, it's a safe place for the player with no enemy, offering a possible retreat from the nasty vore attacks, goodies to refill one's inventory and health, a beautiful painting to enjoy and even a secret.
When watching playthroughs, I realized that the place was potentially a pace killer for too hasty players. Firstly, some of them do really have a hard time finding the bull switch to open it; that's because the switch placement is more Hexen-ish (sideways, requiring a tad of attention to be noticed) than truly Quake-ish (right away in plain sight). Secondly, the switch deploying the drawbridge is "hidden" behind one of knight armors and it matches colors with the wall; that double characteric is again typical of the Hexen series; it admittedly contrasts with Quake's usual signposted buttons flashing in the dark like Las Vegas neon signs.
| Church & stone |

Real life St. John's Roman Catholic Church

Excerpt from Providence, issue #9

Jacen Burrows' Dreadful Beauty art book cover

Camilla's Tower
❝ Of all the distant objects on Federal Hill, a certain huge, dark church most fascinated Blake. It stood out with especial distinctness at certain hours of the day, and at sunset the great tower and tapering steeple loomed blackly against the flaming sky. It seemed to rest on especially high ground; for the grimy façade, and the obliquely seen north side with sloping roof and the tops of great pointed windows, rose boldly above the tangle of surrounding ridgepoles and chimney-pots. Peculiarly grim and austere, it appeared to be built of stone, stained and weathered with the smoke and storms of a century and more. The style, so far as the glass could show, was that earliest experimental form of Gothic revival which preceded the stately Upjohn period and held over some of the outlines and proportions of the Georgian age. Perhaps it was reared around 1810 or 1815. ❞
This time I didn't want to recreate the entire church. I had already made a church in Church of the Unholy and anyway Carcosa is famous for its towers, not churches. So keeping the steeple only felt the right thing to do.
Apart from the exterior design, Camilla's tower keeps other similarities with the St. John's Church depicted in The Haunter of the Dark: a resting place for the mysterious shining trapezohedron (an artifact coming straight out of Lovecraft's story) and the titular Haunter of the Dark creature upstairs lying in the steeple's upper room in complete darkness. In HPL's short story, there are two rooms involved in the steeple, actually: the one with the creature at the very top, and the one below where the shining trapezohedron is found (let's call it the trapezohedron room).
Here is how the trapezohedron room is described:
❝ The room, about fifteen feet square, was faintly lighted by four lancet windows, one on each side, which were glazed within their screening of decayed louver-boards. These had been further fitted with tight, opaque screens, but the latter were now largely rotted away. In the center of the dust-laden floor rose a curiously angled stone pillar home four feet in height and two in average diameter, covered on each side with bizarre, crudely incised and wholly unrecognizable hieroglyphs. On this pillar rested a metal box of peculiarly asymmetrical form; its hinged lid thrown back, and its interior holding what looked beneath the decade-deep dust to be an egg-shaped or irregularly spherical object some four inches through. Around the pillar in a rough circle were seven high-backed Gothic chairs still largely intact, while behind them, ranging along the dark-paneled walls, were seven colossal images of crumbling, black-painted plaster, resembling more than anything else the cryptic carven megaliths of mysterious Easter Island. In one corner of the cobwebbed chamber a ladder was built into the wall, leading up to the closed trap door of the windowless steeple above. ❞
The place ressembling the trapezohedron room the most in the whole map, despite divergences, may arguably be Cassilda's tower upper room with its stone pilar, weird hieroglyphs on the room's walls, and colossal stone images (the "burning eyes").

The "stone from Manchester" (Providence, issue #9)

Star trapezohedron of the 5/3 kind
❝ This stone, once exposed, exerted upon Blake an almost alarming fascination. He could scarcely tear his eyes from it, and as he looked at its glistening surfaces he almost fancied it was transparent, with half-formed worlds of wonder within. ❞
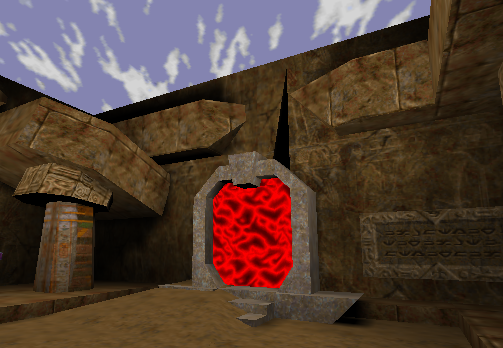
A glistening surface with half-formed worlds of wonder within...
| A mysterious machinery |
- Firstly they simply couldn't figure out that the machinery in question was simply the one they could already see a dozen meters away through the grate (and then they would start running through the whole map and explore it all again sometimes back to even the starting area!)
- Secondly, even when they had gotten in control of the turret, they did nothing with that information, sometimes shot at point blank range on the turret itself, and simply left the place without trying anything more.
As with the ogre conversation, shooting at the window with the turret is a showcase of how the Re:Mobilize mechanics can be used in unexpected ways. The window has an invisible lightpanel featuring the usual rotating tracer so that the user understands they should press the HOOK button, but when doing so no pulling occurs. Instead, an event is raised which causes the turret to fire. Lightpanels can therefore be an interesting variation around trigger_look or shoot buttons; they require aiming in a similar way to activate something, while having their own specific functioning which is not identical to either of them.
The machinery's wheels are one of the many occurrences of my unexplainable fascination for rotating things. Maybe because it's not natural in Quake, I tend to put rotating stuff everywhere: falling tree in the starting area, drawbridge at the city gate, drawbridge over the lower city staircase, burning eyes, opening chest, tilting crucible, etc. Those wheels are also a cool and different kind of button, and a reminiscence of the Hexen series where they are a popular gimmick.

Wheel in a sewer in Hexen (1995)

Here we go again! Wheel in a sewer in Hexen II (1997)

Anthropomorphic sample

Anthropomorphic fest
| The Haunter of the Dark |
The visible ones consist in five models:
-
A tentacled body made by Madfox for their "dark young" monster featured in FourFeather.
It plays with the popular cliché of Lovecraftian creatures being tentacled. -
An eye which is an asset from the early Hexen II beta never having made its way to the final release of the game (an Easter Egg for longtime Hexen II fans).
It is one of many references throughout the map around eyes, vision, darkness and clear-sightedness. A sub-theme being "burning eyes" found in several different flavors: the Haunter's eye casting lethal lightnings at the player, the murals in Cassilda's tower freeing the trapezohedron in a similar way, the Haunter's orbiting globes (see below), and the weird "eye in robes" pattern found in two staircases (the one leading down to the graveyard and the one in the lower city) which also fires deadly at the player.
- Three globes orbiting around the Haunter.
The model is borrowed from the well-known light globes of the original Quake, here embellished with hellknight trails.
They are part of the "burning eyes" theming of the map as they're supposed to nod to Lovecraft's Haunter of the Dark's "three-lobed burning eye". The reference here blends with another one. François Bourgeon is one of the greatest French masters of comics; in his Les yeux d'étain de la ville glauque (roughly translatable as "The Tin Eyes of the Gloomy City"), a mysterious dream-city populated with scary creatures (not unlike Lovecraft's dreamlands cities or Carcosa) is guarded by three floating lethal tin eyes looking like brown-yellowish flying globes.

The threatening tin eyes facing the heroes
Funnily, when they figure out that, unlike the creature, the pillars are breakable, some players concentrate their shots on the only protection they have, thus playing against their own side!
True to the creature's depiction in The Haunter of the Dark, the boss hates the light (hence the place being very dark at first). That's the reason why the louvers are another help to the player: when shot, they let light from the outside pour into the room. The creature then closes its eye for a few seconds during which it doesn't fire anymore, conveniently becoming a passive target. To maximize that kind of help, each window becomes breakable only when the monster has become active again. Unfortunately, players failing at understanding the fight mechanics shoot a window, then concentrate their shots one the next one instead of shooting at the tin eyes, thus wasting the help.
The boss fight is not that hard anyway and, because of its high scripting complexity, may even occasionally bug in favor of the player. So any mistake is easily forgiven.
| Treasure room |

docjr5's stunning and subtle work of art
Visually it tries to make the most of the contrasting yellow and violet/blue complementary colors. docjr5 made it way nicer by crafting an exclusive fence version of the gold coins texture for the carpet of gold's edges, and texture variations with golden reflections on the brickwork.
Otherwise, the place is pretty small and simple. The chests are a nice touch: two of them are fancy themed versions of classic pickups (health and nails), while the main one has a nice opening animation which gives a sense of ceremony... and trap! None of the chests is a model. All of them are brushwork, including the opening one whose lid is one of those rotate_objects I praise so much.
As expected, grabbing the gold bar summons a nasty guardian; a customized shambler wearing a rad lava skin made by FloofCollie. There is not much room to escape, yet the pillars offer a good protection and allow to discard the beast pretty easily.
Now that the player has the gold bar, the end of the game is likely just a minute away. Yet an unexpected amount of options are available:
- Get back to the ferryman, give him the gold bar and take the boat to the Isle of the Dead (classic exit).
- Get back to the forge, melt the gold bar into a gold key, get back to the ferryman, give him the gold key and take the boat to the Isle of the Dead (classic exit). Yup, as long as it's gold, the ferryman doesn't care.
- Get back to the forge, melt the gold bar into a gold key and use it to open the gold key door in the Court of the Dragon (secret exit).
- Get back to the altar of Hastur, drop off the gold bar as an offering, get the god's reward, then take the gold bar back and choose one of the previous options to exit the map.
| Directions (secret map) |
The puzzles are not tremendously complex. The peaceful exploration of a completely abstract place is just as much the point as solving its small riddles. The experience is therefore more like a quiet break between two adventures than an adventure in itself.
This map was not planned initially. The idea was induced by the reading of Marc-Antoine Mathieu's Sens concept comic. It features the exploration of an absurd abstract world full of nonsensical arrows by a character in search of meaning (that's a word play in French, "sens" meaning "meaning", "sense" and "direction" at the same time). I tried to somehow recreate the spirit of the comic in a Quake map, as well as some of its sceneries literally.

